
为 WSL2 配置代理
以代理在 7890 端口的 clash 为例。
打开 Allow LAN 选项。(如果在公网环境下慎选,特指某华校园网)
可以在 Clash 配置文件中添加鉴权确保安全性,在 Profile 选项卡内,右键当前配置文件 Edit,添加如下内容:
# authentication of local SOCKS5/HTTP(S) server
authentication:
 - "user1:pass1"
 - "user2:pass2"
在控制面板中找到 允许应用或功能通过 Windows Defender防火墙 并勾选 clash-win64.exe
export hostip=$(cat /etc/resolv.conf |grep -oP '(?<=nameserver\ ).*')
export https_proxy="http://${hostip}:7890"
export http_proxy="http://${hostip}:7890"
在 Ubuntu 中使用 Clash
下载
在 clash 项目地址 release 处下载适用于 Linux 的 Clash。
解压并将其重命名为 clash
gunzip clash-linux-amd64-v1.10.0.gz
mv clash-linux-amd64-v1.10.0 clash
为 clash 添加可执行权限:
chmod u+x clash
Clash 运行时需要 Country.mmdb 文件,当第一次启动 Clash 时(使用 ./clash 命令) 会自动下载(会下载至 /home/XXX/.config/clash 文件夹下)。自动下载可能会因网络原因较慢,可以手动下载。
Country.mmdb文件利用 GeoIP2 服务能识别互联网用户的地点位置,以供规则分流时使用。
配置文件
一般的网络服务提供了 Clash 订阅链接,可以直接下载链接指向的文件内容,保存到 config.yaml 中。
Clash as a daemon
关于 WSL2 支持 systemd,可以参考官方文档。
将 Clash 转变为系统服务,从而使得 Clash 实现常驻后台运行、开机自启动等。
普通用户需要
sudo权限。
配置 systemd 服务
Linux 系统使用 systemd 作为启动服务器管理机制,首先把 Clash 可执行文件拷贝到 /usr/local/bin 目录,相关配置拷贝到 /etc/clash 目录。
sudo mkdir /etc/clash
sudo cp clash /usr/local/bin
sudo cp config.yaml /etc/clash/
sudo cp Country.mmdb /etc/clash/
创建 systemd 服务配置文件 sudo vim /etc/systemd/system/clash.service:
[Unit]
Description=Clash daemon, A rule-based proxy in Go.
After=network.target

[Service]
Type=simple
Restart=always
ExecStart=/usr/local/bin/clash -d /etc/clash

[Install]
WantedBy=multi-user.target
使用 systemctl
使用以下命令,让 Clash 开机自启动:
sudo systemctl enable clash
然后开启 Clash:
sudo systemctl start clash
查看 Clash 日志:
sudo systemctl status clash
sudo journalctl -xe
DashBoard 外部控制
外部控制端口为 9090,因此也可以访问该链接,输入 IP 地址(需本机可以访问的 IP)以及端口号 9090,来进入 Clash Dashboard 进行节点的选择。也可以在服务器自行搭建 Clash Dashboard,请参见该项目。不过 Clash Dashboard 用处不大,使用订阅转换后的配置文件包含了自动选择的功能,Clash 会自动选择延迟最低的节点。
设置密码
export 命令其他用户执行后也可以使用该代理,此时通过可以更换代理端口、添加密码等措施加以限制。修改 /etc/clash/config.yaml 文件部分配置:
mixed-port: 12345
authentication:
  - "用户名1:密码1"
  - "用户名2:密码2"
allow-lan: true
mode: Rule
log-level: info
external-controller: :9090
mixed-port: 12345 就是混合代理端口,即使用代理时所指定的端口。然后需要重启 Clash,命令为:
sudo systemctl restart clash
根据上述配置文件,export 命令变为
export https_proxy=http://用户名1:密码1@127.0.0.1:12345 http_proxy=http://用户名1:密码1@127.0.0.1:12345 all_proxy=socks5://用户名1:密码1@127.0.0.1:12345
TUN 模式
新版的 Clash Premium 内核支持 TUN 模式,且目前已支持 Linux 系统下的 auto-route 和 auto-detect-interface,无需手动设置转发表,可以方便快捷的实现 透明网关(旁路由) 的功能。
首先需要下载 Clash Premium 版本,替换上面的 clash 文件。接着需要设置 Linux 系统,开启转发功能。编辑文件 /etc/sysctl.conf,添加以下内容:
net.ipv4.ip_forward=1
保存退出后,执行以下命令使修改生效:
sudo sysctl -p
然后接着需要关闭系统的 DNS 服务,使用以下命令:
sudo systemctl stop systemd-resolved
sudo systemctl disable systemd-resolved
关于代理环境下 DNS 解析行为的深入探讨,可以参见浅谈在代理环境中的 DNS 解析行为以及我有特别的 DNS 配置和使用技巧。
接着需要设置 Clash 的配置文件,添加以下内容:
dns:
  enable: true
  listen: 0.0.0.0:53
  enhanced-mode: fake-ip
  nameserver:
    - 114.114.114.114
  fallback:
    - 8.8.8.8
tun:
  enable: true
  stack: system # or gvisor
  dns-hijack:
    - 8.8.8.8:53
    - tcp://8.8.8.8:53
    - any:53
    - tcp://any:53
  auto-route: true # auto set global route
  auto-detect-interface: true # conflict with interface-name
最后重启 Clash 服务即可,这样流量就会通过 TUN 接口转发,同时利用强大的分流规则,实现按需代理。也可以设置局域网内的网关地址和 DNS 服务器地址,实现透明网关。
自动更新订阅
Clash 是一个基于 Golang 开发的代理工具,支持 Vmess, Shadowsocks, Snell 和 SOCKS5 协议。Clash 也有 Android 版本和 OS X 版本,配置文件通用,但是对于 Linux,目前似乎还没有人开发自定订阅配置的功能,Clash 的作者开发了一个 Web UI 叫 Clash Dashboard,可以在网页中调用相应 Restful API 调整相关配置,目前的版本(0.3.0)并没有配置订阅功能。
Clash 本身可以根据配置文件做到负载均衡和自动切换,因此,如果你的代理服务商提供了在线配置,能够做到实时更新配置的话,将是最省心的选择。
本文通过 systemctl 来管理 Clash 的进程,对应 clash.service 文件,通过两个脚本 start-clash.sh 和 stop-clash.sh 来管理 Clash 的启停,具体配置如下。
# edit and save this file to /usr/lib/systemd/system/clash.service
[Unit]
Description=clash
After=network.target

[Service]
WorkingDirectory="your home directory"/.config/clash
ExecStart="your home directory"/.config/clash/start-clash.sh
ExecStop="your home directory"/.config/clash/stop-clash.sh
Environment="HOME=your home directory"
Environment="CLASH_URL=your subscribe address"

[Install]
WantedBy=multi-user.target
#!/bin/bash
# save this file to ${HOME}/.config/clash/start-clash.sh

# save pid file
echo $$ > ${HOME}/.config/clash/clash.pid

diff ${HOME}/.config/clash/config.yaml <(curl -s ${CLASH_URL})
if [ "$?" == 0 ]
then
    /usr/bin/clash
else
    TIME=`date '
    cp ${HOME}/.config/clash/config.yaml "${HOME}/.config/clash/config.yaml.bak${TIME}"
    curl -L -o ${HOME}/.config/clash/config.yaml ${CLASH_URL}
    /usr/bin/clash
fi
#!/bin/bash
# save this file to ${HOME}/.config/clash/stop-clash.sh

# read pid file
PID=`cat ${HOME}/.config/clash/clash.pid`
kill -9 ${PID}
rm ${HOME}/.config/clash/clash.pid
配置添加完成后,执行以下代码就可以启动Clash并设置为开机自启动。
systemctl enable clash
systemctl start clash
为 Ubuntu 配置代理
使用环境变量 http_proxy 和 https_proxy 来修改。
将环境变量设置为形如 http://user:passwd@ip:port
如果用户名和密码中含有特殊字符,如 @ # ! $ 等,需要使用
@==>
$==>
#==>
!==>
bash
在 ~/.bash_profile 中添加如下内容:
function proxy_on() {
    export http_proxy=http://127.0.0.1:7890
    export https_proxy=\$http_proxy
    echo -e "终端代理已开启。"
}

function proxy_off(){
    unset http_proxy https_proxy
    echo -e "终端代理已关闭。"
}
zsh
在 ~/.zshrc 配置文件中添加如下内容:
proxy_on() {
    export http_proxy=http://127.0.0.1:7890
    export https_proxy=\$http_proxy
    echo -e "终端代理已开启。"
}

proxy_off(){
    unset http_proxy https_proxy
    echo -e "终端代理已关闭。"
}
之后可以在终端输入 proxy_on 打开代理,输入 proxy_off 关闭代理。
miniconda 的配置
本文以 Miniconda3-py39_22.11.1-1-Linux-x86_64.sh 为例
随便找个什么地方把文件搞到 Ubuntu 里。比如 这个链接
直接运行,一顿 ENTER 再输个 yes。
接下来就会在当前目录(用户根目录?)下出现一个 miniconda3 文件夹。
运行 ./miniconda/bin/conda init <bash/zsh/...> 之后重启 Ubuntu。
之后就可以愉快地使用 conda 了。
conda 基础指令
conda create -n <name> python=<2.7/3.7/3.8/...>
创建一个 python 环境,名称为 name ,使用 python 2.7/3.7/3.8/...conda activate <name>
启用环境 name。conda deactivate
退出当前环境。conda info -e
查看所有环境的信息。conda remove -n <name> --all
删除环境 name
zsh 的配置
- 下载 zsh
sudo apt install zsh - 检查安装成功
cat /etc/shells结果出现/bin/zsh - 将 zsh 指定为默认终端
sudo chsh -s /bin/zsh <username>其中<username>为自己的用户名
oh-my-zsh 的配置
可以根据项目地址中的介绍安装。
一点 oh-my-zsh 插件推荐
zsh-autosuggestions会记录之前输入过的所有命令,并且自动匹配可能想要输入的命令。可以使用 Ctrl+e 一键补全。项目地址zsh-syntax-highlighting提示当前命令是否正确,错误红色,正确绿色。项目地址z会将你每次 cd 过的目录存起来放到~/.z文件中。通过正则匹配,并带你到使用频率最高的目录。官方插件,直接在配置文件中启用。-r:导航到排名最高的目录-t:导航到最近访问的目录-l:按使用频率列出目录-x <dir>:删除不想要的目录
extract使用x命令一键解压诸多格式的压缩文件。官方插件,直接在配置文件中启用。
官方主题
agnoster 主题配置 (Window Terminal + WSL2)
在配置文件中改好主题后会出现三角形无法正确显示的情况,需要修改 Windows Terminal 的字体。
在 Powerline-patched font 下载 zip,并安装 DejaVuSansMono 字体(可根据个人喜好更改)
在 Windows Terminal 中将 Ubuntu 使用的字体更改为 DejaVu Sans Mono for Powerline 。
至此乱码问题解决。
色彩
色彩可以更改 ~/.oh-my-zsh/themes/agnoster.zsh-theme。
我的配置如下:
# vim:ft=zsh ts=2 sw=2 sts=2
#
# agnoster's Theme - https://gist.github.com/3712874
# A Powerline-inspired theme for ZSH
#
# # README
#
# In order for this theme to render correctly, you will need a
# [Powerline-patched font](https://github.com/Lokaltog/powerline-fonts).
# Make sure you have a recent version: the code points that Powerline
# uses changed in 2012, and older versions will display incorrectly,
# in confusing ways.
#
# In addition, I recommend the
# [Solarized theme](https://github.com/altercation/solarized/) and, if you're
# using it on Mac OS X, [iTerm 2](https://iterm2.com/) over Terminal.app -
# it has significantly better color fidelity.
#
# If using with "light" variant of the Solarized color schema, set
# SOLARIZED_THEME variable to "light". If you don't specify, we'll assume
# you're using the "dark" variant.
#
# # Goals
#
# The aim of this theme is to only show you *relevant* information. Like most
# prompts, it will only show git information when in a git working directory.
# However, it goes a step further: everything from the current user and
# hostname to whether the last call exited with an error to whether background
# jobs are running in this shell will all be displayed automatically when
# appropriate.
### Segment drawing
# A few utility functions to make it easy and re-usable to draw segmented prompts
CURRENT_BG='NONE'
case ${SOLARIZED_THEME:-dark} in
light) CURRENT_FG='white';;
*) CURRENT_FG='black';;
esac
# Special Powerline characters
() {
local LC_ALL="" LC_CTYPE="en_US.UTF-8"
# NOTE: This segment separator character is correct. In 2012, Powerline changed
# the code points they use for their special characters. This is the new code point.
# If this is not working for you, you probably have an old version of the
# Powerline-patched fonts installed. Download and install the new version.
# Do not submit PRs to change this unless you have reviewed the Powerline code point
# history and have new information.
# This is defined using a Unicode escape sequence so it is unambiguously readable, regardless of
# what font the user is viewing this source code in. Do not replace the
# escape sequence with a single literal character.
# Do not change this! Do not make it '\u2b80'; that is the old, wrong code point.
SEGMENT_SEPARATOR=$'\ue0b0'
}
# Begin a segment
# Takes two arguments, background and foreground. Both can be omitted,
# rendering default background/foreground.
prompt_segment() {
local bg fg
[[ -n $1 ]] && bg=
[[ -n $2 ]] && fg=
if [[ $CURRENT_BG != 'NONE' && $1 != $CURRENT_BG ]]; then
echo -n "
else
echo -n
fi
CURRENT_BG=$1
[[ -n $3 ]] && echo -n $3
}
# End the prompt, closing any open segments
prompt_end() {
if [[ -n $CURRENT_BG ]]; then
echo -n "
else
echo -n
fi
echo -n
CURRENT_BG=''
}
### Prompt components
# Each component will draw itself, and hide itself if no information needs to be shown
# Context: user@hostname (who am I and where am I)
prompt_context() {
if [[ "$USERNAME" != "$DEFAULT_USER" || -n "$SSH_CLIENT" ]]; then
prompt_segment white black
fi
}
# Git: branch/detached head, dirty status
prompt_git() {
(( $+commands[git] )) || return
if [[ "$(git config --get oh-my-zsh.hide-status 2>/dev/null)" = 1 ]]; then
return
fi
local PL_BRANCH_CHAR
() {
local LC_ALL="" LC_CTYPE="en_US.UTF-8"
PL_BRANCH_CHAR=$'\ue0a0' #
}
local ref dirty mode repo_path
if [[ "$(git rev-parse --is-inside-work-tree 2>/dev/null)" = "true" ]]; then
repo_path=$(git rev-parse --git-dir 2>/dev/null)
dirty=$(parse_git_dirty)
ref=$(git symbolic-ref HEAD 2> /dev/null) || ref="➦ $(git rev-parse --short HEAD 2> /dev/null)"
if [[ -n $dirty ]]; then
prompt_segment yellow black
else
prompt_segment green $CURRENT_FG
fi
local ahead behind
ahead=$(git log --oneline @{upstream}.. 2>/dev/null)
behind=$(git log --oneline ..@{upstream} 2>/dev/null)
if [[ -n "$ahead" ]] && [[ -n "$behind" ]]; then
PL_BRANCH_CHAR=$'\u21c5'
elif [[ -n "$ahead" ]]; then
PL_BRANCH_CHAR=$'\u21b1'
elif [[ -n "$behind" ]]; then
PL_BRANCH_CHAR=$'\u21b0'
fi
if [[ -e "${repo_path}/BISECT_LOG" ]]; then
mode=" <B>"
elif [[ -e "${repo_path}/MERGE_HEAD" ]]; then
mode=" >M<"
elif [[ -e "${repo_path}/rebase" || -e "${repo_path}/rebase-apply" || -e "${repo_path}/rebase-merge" || -e "${repo_path}/../.dotest" ]]; then
mode=" >R>"
fi
setopt promptsubst
autoload -Uz vcs_info
zstyle ':vcs_info:*' enable git
zstyle ':vcs_info:*' get-revision true
zstyle ':vcs_info:*' check-for-changes true
zstyle ':vcs_info:*' stagedstr '✚'
zstyle ':vcs_info:*' unstagedstr '±'
zstyle ':vcs_info:*' formats '
zstyle ':vcs_info:*' actionformats '
vcs_info
echo -n "${${ref:gs
fi
}
prompt_bzr() {
(( $+commands[bzr] )) || return
# Test if bzr repository in directory hierarchy
local dir="$PWD"
while [[ ! -d "$dir/.bzr" ]]; do
[[ "$dir" = "/" ]] && return
dir="${dir:h}"
done
local bzr_status status_mod status_all revision
if bzr_status=$(bzr status 2>&1); then
status_mod=$(echo -n "$bzr_status" | head -n1 | grep "modified" | wc -m)
status_all=$(echo -n "$bzr_status" | head -n1 | wc -m)
revision=${$(bzr log -r-1 --log-format line | cut -d: -f1):gs
if [[ $status_mod -gt 0 ]] ; then
prompt_segment yellow black "bzr@$revision ✚"
else
if [[ $status_all -gt 0 ]] ; then
prompt_segment yellow black "bzr@$revision"
else
prompt_segment green black "bzr@$revision"
fi
fi
fi
}
prompt_hg() {
(( $+commands[hg] )) || return
local rev st branch
if $(hg id >/dev/null 2>&1); then
if $(hg prompt >/dev/null 2>&1); then
if [[ $(hg prompt "{status|unknown}") = "?" ]]; then
# if files are not added
prompt_segment red white
st='±'
elif [[ -n $(hg prompt "{status|modified}") ]]; then
# if any modification
prompt_segment yellow black
st='±'
else
# if working copy is clean
prompt_segment green $CURRENT_FG
fi
echo -n ${$(hg prompt "☿ {rev}@{branch}"):gs
else
st=""
rev=$(hg id -n 2>/dev/null | sed 's/[^-0-9]//g')
branch=$(hg id -b 2>/dev/null)
if `hg st | grep -q "^\?"`; then
prompt_segment red black
st='±'
elif `hg st | grep -q "^[MA]"`; then
prompt_segment yellow black
st='±'
else
prompt_segment green $CURRENT_FG
fi
echo -n "☿ ${rev:gs
fi
fi
}
# Dir: current working directory
prompt_dir() {
prompt_segment blue $CURRENT_FG
}
# Virtualenv: current working virtualenv
prompt_virtualenv() {
if [[ -n "$VIRTUAL_ENV" && -n "$VIRTUAL_ENV_DISABLE_PROMPT" ]]; then
prompt_segment blue black "(${VIRTUAL_ENV:t:gs
fi
}
# Status:
# - was there an error
# - am I root
# - are there background jobs?
prompt_status() {
local -a symbols
[[ $RETVAL -ne 0 ]] && symbols+=
[[ $UID -eq 0 ]] && symbols+=
[[ $(jobs -l | wc -l) -gt 0 ]] && symbols+=
[[ -n "$symbols" ]] && prompt_segment black default "$symbols"
}
#AWS Profile:
# - display current AWS_PROFILE name
# - displays yellow on red if profile name contains 'production' or
# ends in '-prod'
# - displays black on green otherwise
prompt_aws() {
[[ -z "$AWS_PROFILE" || "$SHOW_AWS_PROMPT" = false ]] && return
case "$AWS_PROFILE" in
*-prod|*production*) prompt_segment red yellow "AWS: ${AWS_PROFILE:gs
*) prompt_segment green black "AWS: ${AWS_PROFILE:gs
esac
}
## Main prompt
build_prompt() {
RETVAL=$?
prompt_status
prompt_virtualenv
prompt_aws
prompt_context
prompt_dir
prompt_git
prompt_bzr
prompt_hg
prompt_end
}
PROMPT=
Windows Terminal 色彩具体渲染
色彩具体渲染可以更改 Windows Terminal 中的配置文件,为 Ubuntu 单独设置配色。
我的配置如下:
"schemes":
    [
        {
            "background": "#0C0C0C",
            "black": "#002B36",
            "blue": "#268BD2",
            "brightBlack": "#74888e",
            "brightBlue": "#4693d2",
            "brightCyan": "#58ecff",
            "brightGreen": "#98C379",
            "brightPurple": "#6C71C4",
            "brightRed": "#CB4B16",
            "brightWhite": "#FDF6E3",
            "brightYellow": "#E4C07A",
            "cursorColor": "#FFFFFF",
            "cyan": "#2AA198",
            "foreground": "#CCCCCC",
            "green": "#bcd800",
            "name": "Solarized Customed",
            "purple": "#D33682",
            "red": "#DC322F",
            "selectionBackground": "#FFFFFF",
            "white": "#EEE8D5",
            "yellow": "#B58900"
        }
    ]
oh-my-zsh 在进入 git 目录时卡顿的问题
因为在进入目录的时候,oh-my-zsh 会执行 git status 去获取 git 的更新信息,当仓库很大的时候就会非常慢了。
设置 oh-my-zsh 不读取文件变化信息(在 git 项目目录执行下列命令)
git config --add oh-my-zsh.hide-dirty 1
如果还觉得慢,可以再设置 oh-my-zsh 不读取任何 git 信息
git config --add oh-my-zsh.hide-status 1
如果想恢复显示,可以将 1 改为 0,或者
git config --remove-section oh-my-zsh
如果实在太卡,以至于仓库都进不去了,那么可以添加 --global ,在所有仓库都禁用这个功能
git config --global --add oh-my-zsh.hide-dirty 1
git config --global --add oh-my-zsh.hide-status 1
查看
# 当前仓库
git config --local -e
# 全局设置
git config --global -e
最终配置文件
我的配置文件如下:
# If you come from bash you might have to change your $PATH.
# export PATH=$HOME/bin:/usr/local/bin:$PATH

# Path to your oh-my-zsh installation.
export ZSH="$HOME/.oh-my-zsh"

# Set name of the theme to load --- if set to "random", it will
# load a random theme each time oh-my-zsh is loaded, in which case,
# to know which specific one was loaded, run: echo $RANDOM_THEME
# See https://github.com/ohmyzsh/ohmyzsh/wiki/Themes
ZSH_THEME="agnoster"

# Set list of themes to pick from when loading at random
# Setting this variable when ZSH_THEME=random will cause zsh to load
# a theme from this variable instead of looking in $ZSH/themes/
# If set to an empty array, this variable will have no effect.
# ZSH_THEME_RANDOM_CANDIDATES=( "robbyrussell" "agnoster" )

# Uncomment the following line to use case-sensitive completion.
# CASE_SENSITIVE="true"

# Uncomment the following line to use hyphen-insensitive completion.
# Case-sensitive completion must be off. _ and - will be interchangeable.
# HYPHEN_INSENSITIVE="true"

# Uncomment one of the following lines to change the auto-update behavior
# zstyle ':omz:update' mode disabled  # disable automatic updates
# zstyle ':omz:update' mode auto      # update automatically without asking
# zstyle ':omz:update' mode reminder  # just remind me to update when it's time

# Uncomment the following line to change how often to auto-update (in days).
# zstyle ':omz:update' frequency 13

# Uncomment the following line if pasting URLs and other text is messed up.
# DISABLE_MAGIC_FUNCTIONS="true"

# Uncomment the following line to disable colors in ls.
# DISABLE_LS_COLORS="true"

# Uncomment the following line to disable auto-setting terminal title.
# DISABLE_AUTO_TITLE="true"

# Uncomment the following line to enable command auto-correction.
# ENABLE_CORRECTION="true"

# Uncomment the following line to display red dots whilst waiting for completion.
# You can also set it to another string to have that shown instead of the default red dots.
# e.g. COMPLETION_WAITING_DOTS=
# Caution: this setting can cause issues with multiline prompts in zsh < 5.7.1 (see #5765)
# COMPLETION_WAITING_DOTS="true"

# Uncomment the following line if you want to disable marking untracked files
# under VCS as dirty. This makes repository status check for large repositories
# much, much faster.
# DISABLE_UNTRACKED_FILES_DIRTY="true"

# Uncomment the following line if you want to change the command execution time
# stamp shown in the history command output.
# You can set one of the optional three formats:
# "mm/dd/yyyy"|"dd.mm.yyyy"|"yyyy-mm-dd"
# or set a custom format using the strftime function format specifications,
# see 'man strftime' for details.
# HIST_STAMPS="mm/dd/yyyy"

# Would you like to use another custom folder than $ZSH/custom?
# ZSH_CUSTOM=/path/to/new-custom-folder

# Which plugins would you like to load?
# Standard plugins can be found in $ZSH/plugins/
# Custom plugins may be added to $ZSH_CUSTOM/plugins/
# Example format: plugins=(rails git textmate ruby lighthouse)
# Add wisely, as too many plugins slow down shell startup.
plugins=(
        git
        zsh-autosuggestions
        z
        zsh-syntax-highlighting
        extract
)

source $ZSH/oh-my-zsh.sh

# User configuration

# export MANPATH="/usr/local/man:$MANPATH"

# You may need to manually set your language environment
# export LANG=en_US.UTF-8

# Preferred editor for local and remote sessions
# if [[ -n $SSH_CONNECTION ]]; then
#   export EDITOR='vim'
# else
#   export EDITOR='mvim'
# fi

# Compilation flags
# export ARCHFLAGS="-arch x86_64"

# Set personal aliases, overriding those provided by oh-my-zsh libs,
# plugins, and themes. Aliases can be placed here, though oh-my-zsh
# users are encouraged to define aliases within the ZSH_CUSTOM folder.
# For a full list of active aliases, run `alias`.
#
# Example aliases
# alias zshconfig="mate ~/.zshrc"
# alias ohmyzsh="mate ~/.oh-my-zsh"

# >>> conda initialize >>>
# !! Contents within this block are managed by 'conda init' !!
__conda_setup="$('/home/ubuntu/miniconda3/bin/conda' 'shell.zsh' 'hook' 2> /dev/null)"
if [ $? -eq 0 ]; then
    eval "$__conda_setup"
else
    if [ -f "/home/ubuntu/miniconda3/etc/profile.d/conda.sh" ]; then
        . "/home/ubuntu/miniconda3/etc/profile.d/conda.sh"
    else
        export PATH="/home/ubuntu/miniconda3/bin:$PATH"
    fi
fi
unset __conda_setup
# <<< conda initialize <<<
proxy_on() {
    export hostip=$(cat /etc/resolv.conf |grep -oP '(?<=nameserver\ ).*')
    export https_proxy="${hostip}:7890"
    export http_proxy="${hostip}:7890"
    echo -e "终端代理已开启。"
}

proxy_off(){
    unset hostip http_proxy https_proxy
    echo -e "终端代理已关闭。"
}
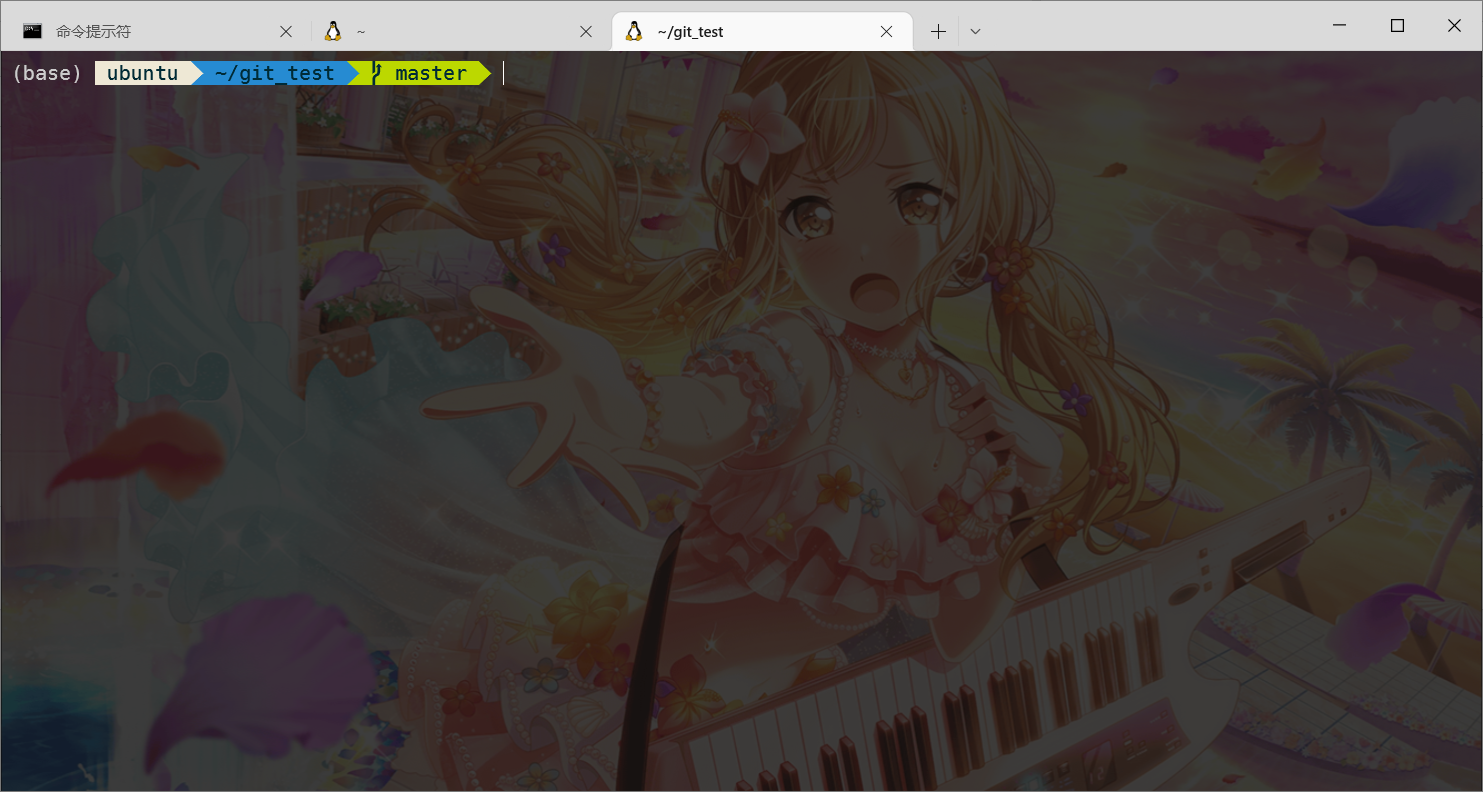
最终效果如图:
Comments NOTHING